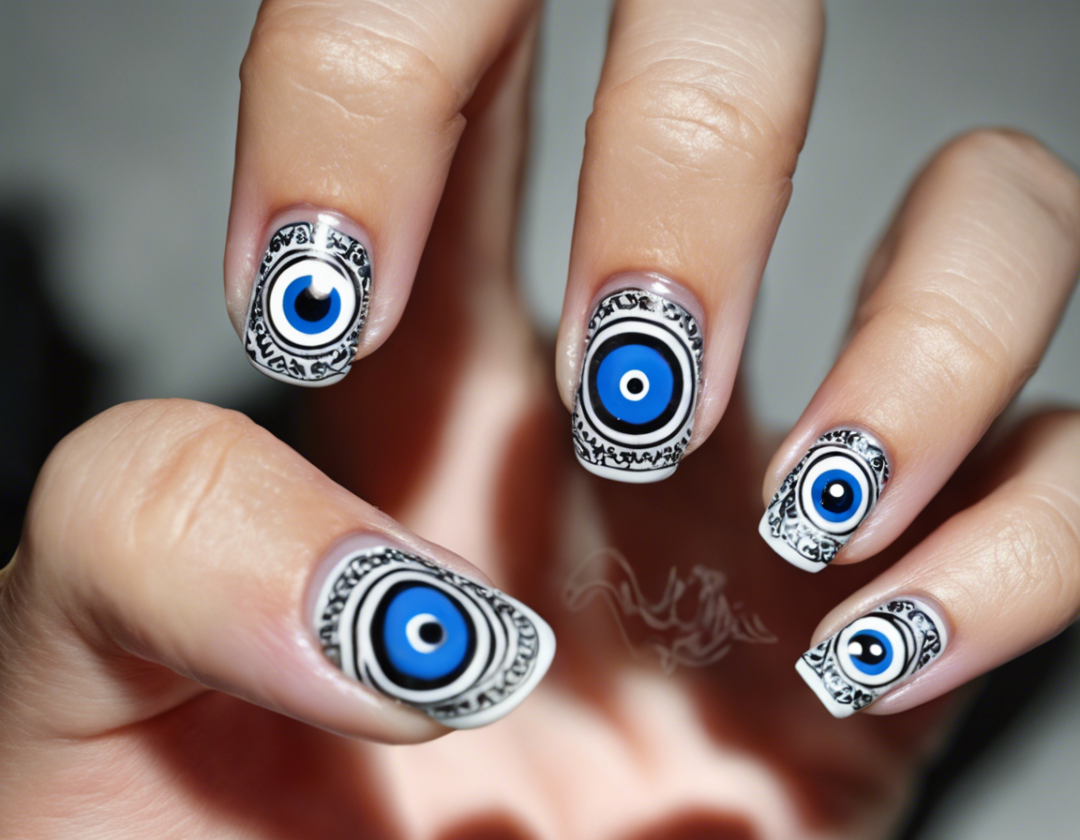
Nailing the Evil Eye Trend: How to Create Evil Eye Nails at Home

The evil eye symbol, believed to provide protection against negative energies and bring good luck, has been a popular trend in the realm of fashion and beauty. From jewelry to clothing, and now even nail art, the evil eye symbol has made its mark in the creative expression of individuals worldwide. If you’ve been swooning over this trend and want to incorporate it into your nail art, you’re in the right place. In this comprehensive guide, we will walk you through how to create evil eye nails at home, allowing you to express your style and spirituality through beautiful and eye-catching nail art.
Understanding the Evil Eye Symbol
Before delving into the nail art tutorial, it’s essential to understand the significance of the evil eye symbol. The evil eye is a belief that a malevolent glare can bring misfortune or injury to those on whom it falls. As a countermeasure, people have embraced the symbol as a way to ward off negativity and attract positive energy.
Materials Needed
To bring the evil eye trend to your nails, you will need a few essential materials. Here’s what you’ll require:
– Base coat and top coat
– Nail polish in various colors
– Nail art brush or toothpick
– Rhinestones or nail gems
– Clear nail polish or nail glue
– Nail tape or striping tape
Step-by-Step Guide to Creating Evil Eye Nails
Now, let’s dive into the exciting part – creating evil eye nails at home. Follow these steps for stunning and mystical nail art:
Step 1: Prepare Your Nails
Start by ensuring your nails are clean and trimmed. Apply a base coat to protect your nails and help the nail polish adhere better.
Step 2: Paint Your Nails
Choose a base color for your nails. You can opt for a solid color or even create a gradient effect using multiple hues. Let the base color dry completely before moving on to the next step.
Step 3: Create Evil Eye Designs
Using a contrasting color, paint an eye shape on each nail. You can use a nail art brush or a toothpick for precision. The evil eye symbol typically features a blue iris with a white highlight and black pupils. Get creative with different eye shapes and sizes on each nail.
Step 4: Add Detail
Enhance your evil eye design by adding intricate details such as eyelashes, tears, or additional colors. This step allows you to personalize each eye and make them truly unique.
Step 5: Embellish with Rhinestones
To make your evil eye nails truly stand out, apply rhinestones or nail gems around the eye design. You can use clear nail polish or nail glue to secure the embellishments in place.
Step 6: Outline with Nail Tape
For a polished look, outline the evil eye design with nail tape or striping tape. This step helps define the eye shape and adds a professional touch to your nail art.
Step 7: Seal with Top Coat
Once you’re satisfied with your evil eye nails, seal the design with a top coat to protect it and ensure longevity. Allow the top coat to dry thoroughly before flaunting your mystical manicure.
Tips for Perfecting Your Evil Eye Nails
- Experiment with different color combinations to create unique evil eye designs.
- Practice on a nail wheel or silicone mat before attempting the design on your nails.
- Use nail art tools like dotting tools and thin brushes for precise detailing.
- Add a matte top coat for a modern twist on the classic evil eye nail art.
Frequently Asked Questions (FAQs)
- Can I create evil eye nails without using nail art tools?
-
While nail art tools can make the process easier, you can achieve evil eye nails using household items like toothpicks or bobby pins for detailing.
-
How long does it take to create evil eye nails?
-
The time needed to create evil eye nails varies based on your experience level and design complexity. It can take anywhere from 30 minutes to an hour.
-
Can I incorporate other symbols with the evil eye on my nails?
-
Yes, feel free to get creative and combine the evil eye symbol with other mystical symbols like moons, stars, or crystals for a whimsical nail art look.
-
Are evil eye nails suitable for all nail lengths?
-
Evil eye nail art can be adapted to suit different nail lengths, whether you prefer short, medium, or long nails.
-
How can I maintain my evil eye nails?
- To prolong the longevity of your evil eye nails, apply a top coat every few days and avoid using your nails as tools to prevent chipping.
In conclusion, creating evil eye nails at home allows you to embrace this enchanting trend and infuse a touch of mysticism into your personal style. By following the step-by-step guide and incorporating your creative flair, you can rock mesmerizing evil eye nail art that is sure to garner compliments and positive vibes wherever you go. So, gather your nail supplies, unleash your inner artist, and let your nails reflect the captivating allure of the evil eye symbol.


